Thursday, April 26, 2012

Free Dinner!

OK, I exaggerate. It’s the last time, I promise. But today I did score some comestibles free of charge by doing a little foraging while hiking on some beautiful public land. I wish I knew more of the edibles out there, but for the time being we were focused on one seasonal treat I frankly don’t even like all that much.


That ugly fungus is a morel, a member of the genus Morchella but I couldn’t tell you which species.  If you live where they grow, I don’t need to tell you some people are positively crazy for them. The appear for a brief period in the spring and lure hundred, probably thousands of Midwesterners to the woods. I found a few while hiking with friends today so they’re going to work their way into dinner somehow. Right now the dish in the lead combines them with shallots and brown rice. That will make a nice accompaniment to the main course which features the leaves you see to the left of the morel.


Garlic mustard, is an invasive exotic weed that, unfortunately, carpets much too much of the woodlands of this region. Its only, meager saving grace is that it’s edible. So, in the event I could find some inspiration for how to use it this evening I pulled a bundle and brought it home.  Here’s what I came up with:


First, we’ll enjoy some hummus that is made with garlic mustard instead of garlic. I was hoping it would be more green.


Then I’m going to broil some lambchops and slather them with a garlic mustard pesto.


I must say, there’s something uniquely satisfying about stuffing an invasive, exotic weed in the food processor and gleefully mashing the power button.

Thursday, April 19, 2012

Puzzlement in the Carrot Patch

I’m puzzled about the carrot seeds I’ve planted. I made seed tape with two varieties of seed I purchased this year following this method and planted them back during the freaky warm spell that is now decidedly over. A few days later I found a package of those cool spherical Parisian carrots on the share shelf at the community garden. They were dated for sale in 2008. In a what-the-heck moment I grabbed them and sowed them thickly in a row since I didn’t know how long carrot sees remain viable in storage. A week or more later I sowed a couple more rows of the seed tape carrots. Here’s the result.


See that fuzzy green strip in the middle of the five rows? Those are the old Parisian seeds planted after the supposedly fresh, seed tape seed.  There is one seedling popped up in the first seed tape planting. Otherwise nada. Several factors need to be considered here like the quality of the new seed—I did go with the “low bid,”—the interaction of the clayey soil and the tape tissue, heck, it could even be that the hi-liter I used to mark the seed locations is an inhibitor. Regardless, I’m disappointed since we were hoping to grow lots of carrots this year. It may be time to buy different seed and start all over. What do you think? I really wanted those Atomic Red carrots.

Monday, April 16, 2012

Banana Appétit!

Today I whipped up a batch of something I wouldn’t have even considered until recently. You see, all my life I’ve believed I have an allergy to bananas. It’s never been a problem since they’re pretty easy to avoid and I don’t even care too much for the smell of them. That all changed on our trip last February to Costa Rica. At the last place we stayed, we were served a sweet, red spread with breakfast that I thought was delicious. It turned out to be Banana Marmalade!


I’ve never had a problem with the flavor of baked foods like banana bread or cookies so maybe it’s just raw bananas that turn me off. And I’m pretty sure if I ever was allergic I’m not now.  In any case, I asked the lodge owner how it was made and she gave me a quick description but no set measurements. Today I just googled for a recipe and used one that appeared several times in the first page of results.


I started with a pound and a half of bananas and a lemon. The recipe also called for the zest of half an orange but since I didn’t have any I used the dried stuff from Penzey’s. And, of course, there’s lots of sugar. Everything just gets dumped in a pot and cooked. I was skeptical at first that there was enough liquid. Having never eaten a raw banana, I always just assumed they were as dry and spongy as they looked.


Once they got cooking I was surprised at the amount of juice that came out. I kept stirring and cooking them on medium-low heat and watched as the fruit broke down and the mixture got thicker.


Eventually the marmalade took on a translucent sheen and a spoonful on a chilled plate had the right consistency after a quick visit to the fridge. You’ll notice, if you’re as attentive as I think you are, that it doesn’t have the pretty red color that the Costa Rican marmalade had. The lodge hostess told me there were no red ingredients and that the color was just from the caramelization of the sugars. Since my batch was getting thick I was hesitant to push it any farther and end  up with a scorched flavor. Maybe next time I’ll be more daring.


I jarred it up and left it to cool before the final tasting. Since it was going in the refrigerator to be eaten right away I didn’t bother with a full-on processing, although the second jar did go in the freezer. Hopefully it’s sugary enough to not expand and break the jar.


Once it had cooled some, I tried it on a piece of toast. Pretty yummy but doesn’t hold a candle to local strawberry jam. Since my strawberry plants are only blooming right now, I don’t think I’ll be jamming any too soon. But this tropical treat might hold us over until the local fruit comes in. My only concern is about the kinds of wildlife it attracts.


Saturday, April 14, 2012

We Have Our First Bees!

A couple days ago The Other Mark called to say he had responded to an opportunity to remove a colony of bees from someone’s house. The notice was posted on the local beekeeping group’s listserv and he jumped right in to say we were on it. We loaded up all the equipment we could think of that we might need and headed to the home to check it out and possibly even do the removal right away.

When we got there it was sunny and warm enough that the bees were flying in and out of a hole in the siding waaaaay up on the second floor.

Fortunately the wall was an exterior screen wall and was easily accessible from the narrow, top-floor deck. After some discussion we decided to postpone attempting to remove it for a couple of days to wait for cooler, overcast weather and an earlier morning start.

So, this morning we packed up again and headed to the home. When we arrived a peek over the wall revealed that only a couple of guard bees were outside the opening and none could be seen flying around. We had listened with a stethoscope previously to guess at the extent of the colony and planned to start removing siding boards at the bottom and work our way up to try to catch the queen if she ran down when the wall was opened.


We all know, of course, that no matter how you plan, there are usually some surprises along the way. When we removed the first siding board thinking we were going to be looking at honeycomb and joists we instead were confronted with a layer of plywood sheathing.  It’s apparent on the left where the wood is damaged from the moisture of the hive inside.

Fortunately the homeowner had a circular saw and with a few deft cuts we were back in business and had the wall open. The colony appeared to be limited to the outermost space between the joists.


With the wood completely off, we could see that the honeycomb hung approximately three feet down. The Other Mark started cutting off sections and we bundled them into frames with string and rubber bands and placed them in the hive bodies we had brought along.


Since this was when things started to get really busy and really sticky, I didn’t take many more pictures of the process. The homeowners, however had front row seats behind the window and watched the entire rescue, taking pictures and fetching us the occasional useful item.  During the time we were working, the bees were remarkably gentle. There were moments when there were quite a few flying around us, but I only noticed a couple times that they were bumping my mask. I didn’t get any stings and The Other Mark had only one fingertip sting when he was cutting.

The colony turned out to be four layers of comb and in the end, we filled up two ten-frame medium hive bodies with lots of comb full of eggs, brood, honey and pollen. They’re pretty messed up at the moment so I hope the bees can clean up and sort things out in their new home. We’re not entirely sure we got the queen but think she might have been in one of the first clumps of bees we dumped in the hive body. Fingers are crossed.

The homeowners couldn’t have been more gracious. When we were all done with the rescue  they served us lemonade and we tasted the honey from a clean section of comb that Mark had saved. It was delicious—sweet and remarkably floral!

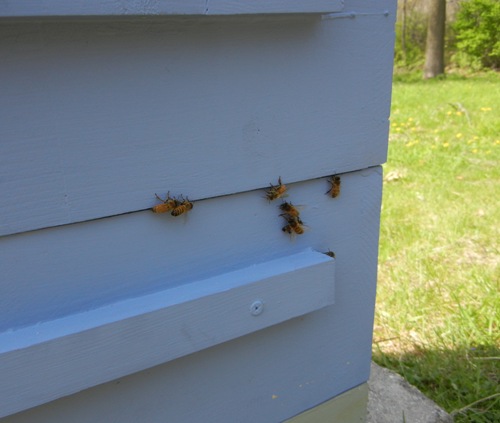
We securely taped together the hive and drove it to our first apiary where we’d prepared to put our package bees.  This hive has been christened Mary in honor of the homeowner. She wanted to keep the bees alive rather than have them exterminated since she’s become aware of the plight of honeybees over the past several years. The bottom two blue hive bodies contain the comb we removed from the wall. The one above it has empty frames in case they decide they still need more room to expand and the top on is where we placed the comb we couldn’t fit in the boxes for them to clean out and utilize.

After they’ve had some time to settle in we’ll check to see how they’re doing, hopefully finding eggs indicating the queen is in there, alive and well. For now they’ve got a big enough task reorienting to their new surroundings and just figuring out how to get in and out of the hive.

Sunday, April 1, 2012

Beehives Decorated!

Yesterday we gathered a small crowd of the young and the less-young to put the finishing touches on our beehives, aesthetically speaking. Unfortunately the weather was on the chilly and gray side but the activity in the garage was colorful. The Other Mark started out with an explanation of the parts of a beehive and why we wanted to decorate the fronts—to help the bees know which ones are their homes.


He then modeled his new bee suit for the amusement of the gathered artists.

Then we all got to the task of painting. We used stencils to make the job a little easier and faster. They worked really well.

One of the artists had had a unit on honeybees in school and knew about the dreaded varroa mites.


The Other Mark even enlisted another artist to decorate his new bee suit.


Once we had enough boxes done to get us started for the season we moved inside to enjoy hot chocolate and cookies and talk bees. The kids were really interested in all aspects of honeybees and beekeeping so we’re hoping to include them in hiving our first packages and in future apiary visits.


The bees will have to be completely insane to swarm and leave these hives!


For now the rest of the boxes are back in our basement where I’ll work at adding decorations over the coming weeks. After I posted the plain painted beehives a friend of mine shared a link to some Slovenian beehive folk art. Check it out. They’re charming.


Have you decorated your beehives? I’d enjoy seeing them if you have. Looking around the Internet, some people have really had fun with making their bees’ homes unique.